
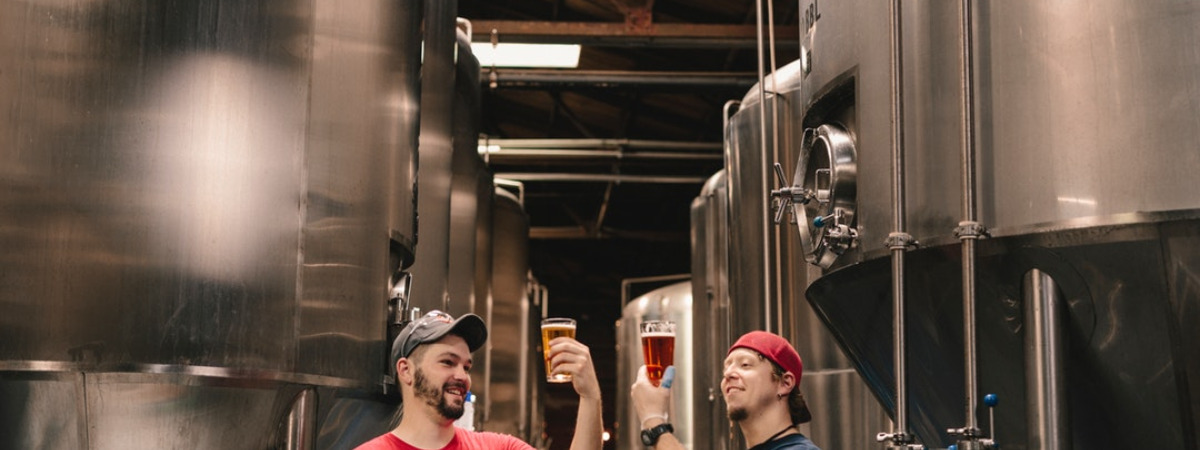
All-grain brewing is covered extensively with a great deal of information in homebrew literature and online. As always, in life with anything we are doing, there is more than one way of getting things done, home brewing is no different.
Some new home brewers just jump right in, hoping for the best, while others will read everything, they can find on home brewing with all-grain. There is a couple of key ideas you need to grasp to get started. Your education and understanding of home brewing will have all the gaps closed as you continue to home brew.
To home brew well, requires a practical experience that you get only by actually brewing. Understanding the quirks of your equipment setup, how to brew with your water, and the techniques of brewing are as important as more advanced technical ideas you get from books or the Internet.
Using both practical experience and the many resources of information available to acquire knowledge will advance your journey from beginner to the accomplished brewer.
Mashing
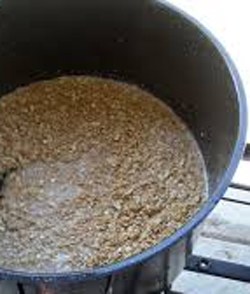
The mashing process starts the all-grain brewing method. After the grains are crushed, either by our supplier or we run them through our mill, they are placed in a mash tun (MT). Next we add hot water to the grain mixture to achieve a temperature 148F to 158F. How much water? Usually, we mixed water at a rate of approximately 1.25-1.50 quarts per pound of a grain mixture.
Brewers use various calculators to determine the temperature and the amount of water for the infusion. There are calculator apps to download to your Smart Phone, and Recipe Design Software you can download to your PC, Tablet, or Phone.

BeerSmith developed by Brad Smith is used by many in the homebrewers. Visit the BeerSmith site, where you can download the software and use for a 21 day-free try-out! Also, you can purchase “How to Brew Videos”, Brad’s Brewing Book, join the Forum and Podcast.
After adding the water to your grain mixture, you will want to stir the mixture to be sure you do not have any dough balls. Then cover your mash tun and leave the mash for 45-60 minutes, time depends on beer style and recipe. For yeast to consume the sugars, easily they must be broken down from complex sugars to simple sugars. This process occurs during the mashing process.
Sparging
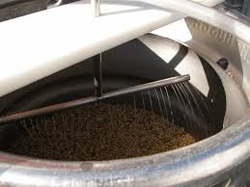
Sparging is the next step in the all-grain brewing method. To sparge, add hot water (maximum temperature of 170F) to the top of your mash tun and drained through the false bottom into your brew kettle. Sparging is a slow process, too fast, and you will leave some of the simple sugars in the grain mixture. Open your valve near the bottom of your mash tun so the draining of the wort will take roughly 20-30 minutes to extract about 6 gallons of wort for a 5-gallon batch. You will need to know the evaporation rate for your boil kettle for the length of your boil. Without your evaporation rate, you will not know how much wort you will need in your BK to achieve a volume that will equal five-gallon batch requirements.
- Once the sparge is complete, and wort is in the boil kettle (BK), we are at the same place we would be with extract brewing. In this method, as in extract brewing we still have the boiling, chilling and fermentation to complete. Although these steps are similar in all-grain as in extract, there are some notable differences.
- Post sparged wort is less concentrated. Therefore, fewer hops required to be used, the same quantity of hops produce more bitterness in the less concentrated wort.
- The wort much be chilled as fast as possible, requiring an efficient chilling system. Either a Stainless Steel or submersible copper coil that will fit in your brewing kettle or a Plate Chiller. (See All-Grain Equipment lists below)
Greater amount of wort means being very careful handling the larger and heavier brew kettle of boiling wort.
Here I want to point out again that good brewing software should be of your toolkit. I use and strongly recommend BeerSmith LLC. Developed by Brad Smith. Using good software will give you the exact quantities of hops required to achieve the bitterness for the style of beer you are brewing.
Equipment
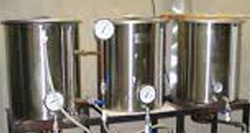
One way to set up an all-grain home brew set up includes three vessels, see image to right.
- Hot-Water Kettle (HLT) – used to heat all the water to be used during the brewing session. Normally brewing water is referred to as brewing liquor; the name of this kettle becomes a hot liquor tank or HLT.
- Mash Tun (MT) – With all-grain brewing, we must extract the same sugars from the grain that were provided by the concentrated extract malt by mashing the grain. We now are required to have a vessel to hold all the grain and mash it (soaking the crushed grain) and lautering (separating the wort from the grain). The vessel or kettle used for Mashing is normally called a Mash Tun (MT). Mash Tuns have a false bottom (perforated SS) or a manifold to allow the wort to flow freely from the MT and leave the spent grains. The MT can be either an SS kettle or a beverage cooler.
- Boil Kettle (BK)Some of the items you are using to brew with extract brewing can be used for all-grain brewing; example, Stirring paddle or sizable spoon, thermometers, etc. Another item you can bring over from your extract brewing days is your Boil Kettle (BK). If it is large enough when extract brewing we were usually boiling approximately one and a half to two gallons of wort. With all-grain brewing, you may be boiling up to 7 gallons to produce a 5-gallon batch of finished beer
Example: a five-gallon batch usually will require three ten gallon/40 quart SS Stockpots that would work well with average gravity beers. Brewing high gravity beers require additional grain to achieve the extraction of more sugar. Thus, larger MT will be required. So while purchasing SS kettles, it is probably best to get 15-gallon kettles to start with, if you like High gravity or big dark beers and will eventually be brewing them.
When I switched from extract to all-grain brewing, I purchased two old beer kegs and used a beverage cooler as the MT. The beer kegs were converted by cutting a 10” opening in the top. Installed fittings where valves, thermometers, sight glasses, etc. I later replaced the beverage cooler MT with another old beer keg. It took a while to calibrate sight glasses and thermometers and figure out all the nuisances of my brewing system, like what was my brewing efficiency?
As I mentioned early in this article, the wort must be chilled quickly, either a submersible coil that will fit in your BK or a plate chiller is required. If you did not purchase one for your extract brewing, you need to get one. Placing your BK in a sink of cool water will not chill it fast enough when trying to cool a larger volume of wort. Last but least, you will need a heat source (other than the kitchen range) to be able to boil approximately 6 gallons of wort vigorously or more wort if you are brewing high gravity beers. Most home brewers use propane burners.
Check with the local homebrewing club and see if they have a Teach a Friend to Homebrew, many clubs do. These events, normally held at a member’s home. Other members of the club will bring their equipment setup and brew a batch of beer during the day. The advantage to attending an event like this is, you will see many different kinds of equipment configurations and giving you the opportunity to talk to the brewers.
Furthermore, the American Homebrewers Association promotes a AHA Big Brew Day. Another event where you can see equipment setups in use and ask questions. BBDays events are held at the local home brew shops. Check this link to find the date of the next AHA Big Brew Day. American Homebrewers Association